
My first camera was a Kodak 110 Instamatic, received for selling magazine subscriptions in a school fundraiser. It didn’t have a flash, zoom lens, or any adjustments—simply point, press the button, and hope for the best. Color film was more expensive at the time, so I opted for black & white (give me a break, I was only nine years old). My financial predicament was not a deterrent, however, as while poring through the pages of National Geographic I realized that the masters of monochrome could create images of unparalleled beauty. They understood how to work with tonal qualities of a scene, how shadows played on a subject, how to manage contrast, and how to capture rich textures in the natural world. In the darkroom, they painstakingly experimented under the enlarger, working with a variety of techniques to render their prints as works of art.
An Original Art Form
If we traveled back in time we would discover that black and white is the original art form, its seeds sown long before the dawn of the Dark Ages. Some of the earliest cave paintings, dating back 30,000 years, were sketched with ash from a fire or the end of a smoldering branch. They depicted humans on the hunt, the prey they pursued, and weapons used to bring them down.
Though we loosely refer to black and white photography as monochrome or grayscale, the final product is comprised of gray tones that lay between white (absence of color) and black (primary colors red, blue, and yellow combined). The color spectrum was absent from consumer photography for nearly 100 years until Eastman Kodak introduced 35mm Kodachrome in 1936. However, it had a steep learning curve, the cost was rather dear, and didn’t hit the mainstream until the `60s. But renowned photographers such as Ansel Adams dismissed this new format, instead focusing on mastering methods of presenting the natural world in black, white, and infinite shades of gray.
Texture, Contrast, and Patterns
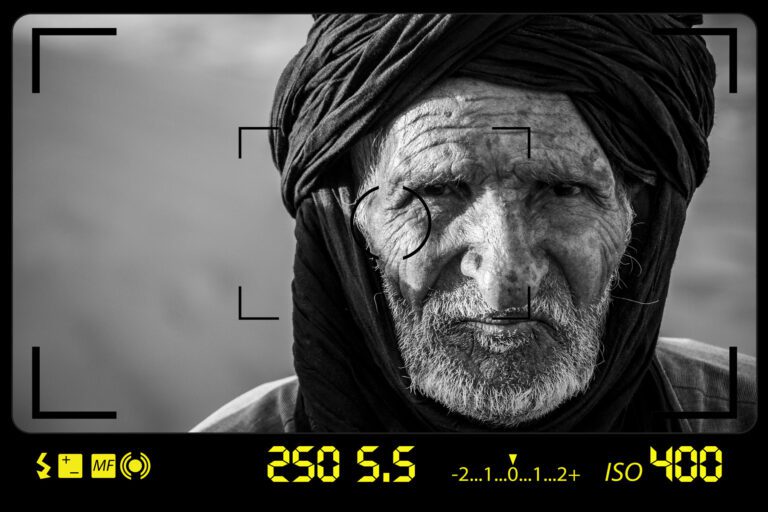
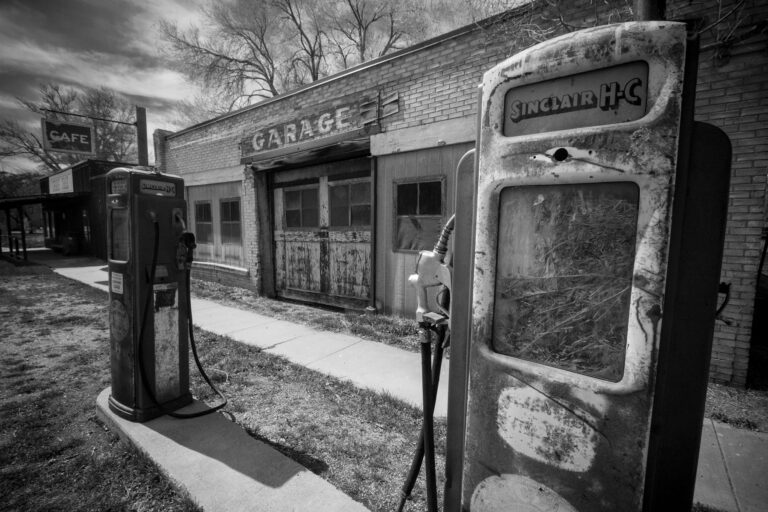
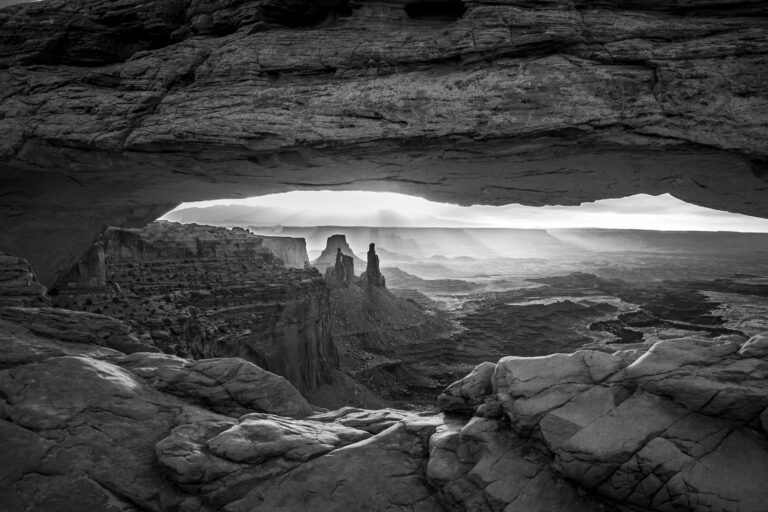
My first words of advice are to head into the field with monochrome in your mental tool bag. That is, as you are assessing a particular scene, think about what frames contain the texture and tonal qualities that might render a compelling black and white. As you look through my selection for this Viewfinder, you will note that each subject embraces the epoch of time eternal; chiseled wrinkles of an elder’s skin, weathered wood panels on a miner’s cabin, sandstone sculpted by wind and water. I personally wouldn’t find interest in a black and white photo of a modern skyscraper, but make that Mesa Arch in Utah’s Canyonlands National Park and you have my attention. But this is only my vision, and as you expand your inner creative you will develop your own style.
I look for patterns, defined lines, or shapes that dissect a frame into its various elements. They might be vertical, horizontal, a convex polygon, anything. The purpose is to draw the viewer’s eyes across the scene, enticing them to explore further. Texture is also a key element; who doesn’t love the weathered grain of barn wood? Once you’ve captured the image, work with it in the digital darkroom to make local adjustments to contrast, clarity, and sharpness. You’ll be surprised how the fissured grain pops from the image.
TIP: Subjects with texture and patterns are a good choice for monochrome conversions.
Dodge and Burn
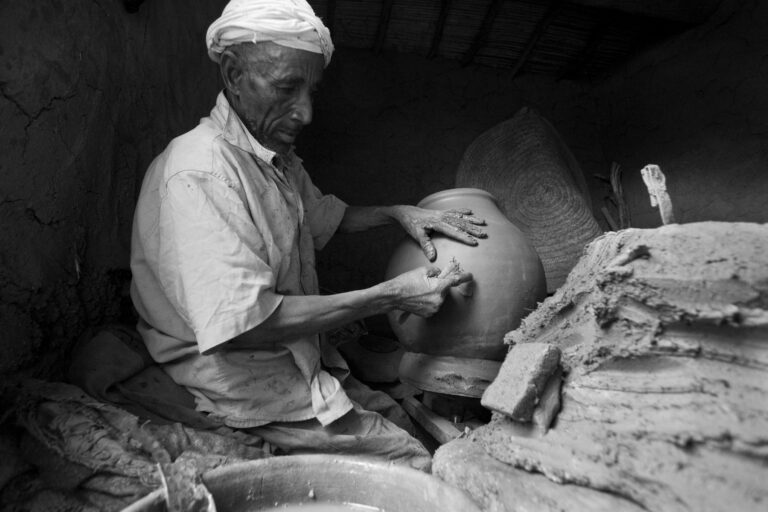
Adams experimented with dodging (lightening) and burning (darkening) elements of a print. While he did this under an enlarger by waving carefully cut cardboard over certain areas, we have the luxury of sophisticated computer software. If we don’t like the result we simply back up and try again. My tools of the trade are Adobe products (Photoshop, Lightroom, and Bridge), which I regularly use to highlight or subdue portions of an image (color and monochrome). The above examples are of a potter I met in the High Atlas, Morocco. While I loved the ocher tones of the original color version, I wondered what it would look like in black and white. The straight conversion needed help, as it did not highlight the subject as the focal point. By burning the background and gently dodging specular highlights, I was able to separate him from his surroundings, drawing the viewer’s eye to the detail of his skin, weathered hands working the clay, and increase the scene’s perceived depth-of-field.
TIP: The dodge and burn technique can be used to highlight or darken areas of an image.
Shootout at High Noon
The magic hours, the 30 minutes that bookend sunrise and sunset, are ideal for capturing vivid color. But when others put their cameras away, monochrome reveals a new realm of opportunity for those that want to keep shooting. Contrast, the harsh shadows created midday, can add dimension. Vivid colors that lose their luster as the sun hits high noon, become a creative canvas in the digital darkroom. But be warned my friends, this won’t make up for a poorly composed or exposed image.
Working with the B&W “color” mixer slide bars, you will find that even in monochrome you can drastically change the appearance. Sliding the blue bar to the left will darken a blue sky. Moving it to the far right will make it appear nearly white. Pretty tricky ey?
Having said this, I suggest you keep an eye on the histogram. Make sure the blacks (left side) and whites (right side) are tapering down to near nil and the middle 90 percent looks like the back of a camel—a predominate hump somewhere on the x-axis. If the camel’s hump butts up against either side, there will be little or no detail in those portions of the frame.
TIP: Rendering an image in black and white can compensate for difficult lighting.
RAW vs. JPEG
I’m often asked if you should shoot in .jpg or RAW format. By all means, shoot in RAW and in the largest file size available. The reason is that when working in RAW, adjustments will not permanently affect the file. They are merely a set of instructions on how the photograph should be displayed in a program that recognizes them. When you are happy with the look, the image then needs to be exported in your chosen format (.jpg or TIFF) for publication or sharing.
Tip: Shoot in your camera’s largest file setting and in RAW format.
Schindler’s Effect
Playing with a combination of the color mixer, brush, and saturation tools, you can isolate a specific area. Steven Spielberg did a remarkable job of this with the little girl wearing a red coat in Schindler’s List, but you can do it in the digital darkroom. Experiment in Lightroom or Bridge, desaturating areas you want monochrome and leaving the subject alone. I like the effect but use it sparingly. You can also accomplish this in Photoshop using layer masks, but that’s a topic for another Viewfinder.
TIP: Working with brush and desaturation tools can isolate the subject from its surroundings.
Final Frame
That nine-year-old kid eventually secured a paper route and moved up to color film and a 35mm camera. But as I developed my photographic skills, I didn’t forget the lessons learned by observing the masters. Black and white photography, as is the case with any creative pursuit, is about personal style. I was wearing a grungy safari hat and pockety cargo pants long before it became overland vogue…but that’s just my style. Pick yours, embrace it, experiment in the digital darkroom, and share with friends. If they say, “That should be in National Geographic,” you have learned well young grasshopper.